Designing the sheet metal process While meeting the functional and appearance requirements of the product, the design of the sheet metal should ensure that the stamping process is simple, the stamping mold is easy to make, the sheet metal stamping quality is high, and the dimensions are stable. After the drawings are designed and produced, different cutting methods are selected according to the expanded drawing and batch size, including laser, CNC punch, shearing, mold, etc., and then the corresponding cutting method is selected according to the drawing requirements.
CNC punching machines are affected by cutting tools. For the processing of some special-shaped workpieces and irregular holes, large burrs will appear on the edges. Later deburring is required, which also has a certain impact on the accuracy of the workpiece;
Laser processing has no tool restrictions and has a flat cross-section, which is suitable for processing special-shaped workpieces, but it takes a long time to process small workpieces.


Polishing after blanking
After the workpiece is blanked, the corners, burrs, and joints need to be trimmed (grinded) as necessary. Use a flat file to trim the tool joints. Use a grinder to trim the workpieces with larger burrs. Small inner hole joints Use the corresponding small file to trim to ensure a beautiful appearance. At the same time, the trimming of the appearance also ensures the positioning during bending, so that the workpiece will be in the same position on the bending machine during bending, ensuring consistent dimensions of the same batch of products.
Sheet metal processing technology
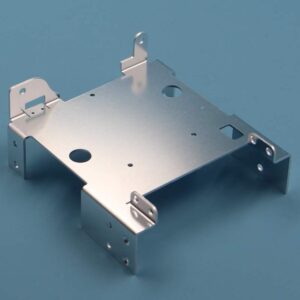
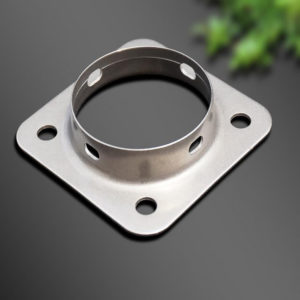
After the blanking is completed, the next process is entered. Different workpieces enter the corresponding processes according to the processing requirements. There are bending, riveting, flanging and tapping, spot welding, convex bulging, and step differences. Sometimes the nuts or studs must be pressed after one or two bends. Among them, the convex bulges and step differences of the mold need to be considered. Process first to avoid interference from other processes after processing first, and not being able to complete all the processes that need to be processed. When there is a hook on the upper cover or lower shell, if it cannot be butt welded after bending, it must be processed before bending.
When bending, you must first determine the tool and slot used for bending based on the dimensions and material thickness on the drawing to avoid deformation caused by collision between the product and the tool. This is the key to selecting the upper mold (in the same product, you may use to different types of upper molds), and the selection of the lower mold is determined based on the thickness of the plate. The second step is to determine the order of bending. The general rule of bending is from inside to outside, from small to large, from special to ordinary. For workpieces with edges that need to be pressed, first bend the workpiece to 30°-40°, and then use a flattening die to press the workpiece to death.
When riveting, consider the height of the stud and select different molds of the same type, and then adjust the pressure of the press to ensure that the surface of the stud and the workpiece are flush to prevent the stud from not being pressed firmly or being pressed out beyond the surface of the workpiece, causing the workpiece to be damaged. scrapped.
Welding includes argon arc welding, spot welding, carbon dioxide shielded welding, manual arc welding, etc. For spot welding, we must first consider the position of the workpiece to be welded. During mass production, consider positioning tooling to ensure the spot welding position is accurate.
In order to make the welding firm, bumps are made on the workpiece to be welded, so that the bumps can be evenly contacted with the flat plate before power welding to ensure consistent heating of each point, and the welding position can also be determined. Similarly, to weld, it is necessary to Adjust the preload time, holding time, maintenance time, and rest time to ensure that the workpiece can be spot welded firmly. After spot welding, weld scars will appear on the surface of the workpiece, which must be processed with a flat grinder. Argon arc welding is mainly used when two workpieces are large and need to be connected together, or when the corners of a workpiece are processed to achieve a smooth surface of the workpiece. ,smooth. The heat generated during argon arc welding can easily deform the workpiece. After welding, it must be processed with a grinder and a flat grinder, especially at the edges and corners.

Surface treatment after processing
The workpiece must be surface treated after bending, riveting and other processes are completed. The surface treatment methods of different plates are different. Surface electroplating is generally performed after cold plate processing. After electroplating, no spraying treatment is performed. Phosphating treatment is used. After chemical treatment, spraying treatment is required. The surface of electroplated plates is cleaned, degreased, and then sprayed.
Stainless steel plates (with mirror panels, matte panels, and brushed panels) can be brushed before bending, and do not need to be sprayed. If spraying is required, roughening is required;
Aluminum plates generally use oxidation treatment, and different oxidation background colors are selected according to different colors of spraying. The commonly used ones are black and natural oxidation; aluminum plates that need to be sprayed are chromate oxidized and then sprayed.
In order to clean the surface, improve the adhesion of the coating film and the corrosion resistance of the coating film. Before surface treatment, the workpiece can be cleaned first. The cleaning process: clean the workpiece first, hang it on the assembly line, first pass through the cleaning solution (alloy oil removal powder), then enter the clean water, and then pass through the spray area , then through the drying area, and finally the workpiece is removed from the assembly line.
Sheet metal spraying process
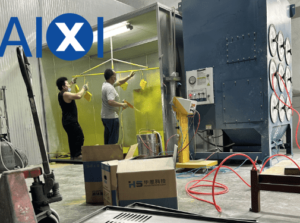
After surface pre-treatment, enter the spraying process. When the workpiece is required to be assembled and sprayed, the teeth or part of the conductive holes need to be protected. A soft glue stick can be inserted into the tooth holes or screws can be screwed in. Those that need conductive protection must be pasted with high-temperature tape. Make positioning fixtures in large quantities for positioning and protection, so that the inside of the workpiece will not be sprayed during spraying. Use screws to protect the nut (flange) holes that can be seen on the outer surface of the workpiece to prevent the nut (flange) holes of the workpiece from being sprayed after spraying. Need to reply.
Some large-volume workpieces are also protected by tooling; when the workpiece is not assembled for spraying, the areas that do not need to be sprayed are blocked with high-temperature-resistant tape and paper, and some exposed nut (stud) holes are protected with screws or high-temperature-resistant rubber. For example, if the workpiece is sprayed on both sides, use the same method to protect the nut (stud) hole; small workpieces are twisted together with lead wires or paper clips and other items before spraying; some workpieces have high surface requirements and must be scraped before spraying; some workpieces are grounded The talisman is protected with a special high-temperature resistant sticker. When spraying, first hang the workpiece on the assembly line, and use an air pipe to blow off the dust on the surface. Enter the spraying area to spray. After spraying, follow the assembly line into the drying area, and finally remove the sprayed workpiece from the assembly line.
assembly
After spraying, enter the assembly process. Before assembly, the protective stickers used in the original spraying must be removed to ensure that the internal threaded holes of the parts have not been sprinkled with paint or powder. During the entire process, gloves must be worn to prevent dust from the hands from adhering to the workpiece. Some workpieces require Blow clean with an air gun.
Detection
In addition to strict requirements in the production process, the quality of sheet metal parts also requires quality inspection independent of production. One is to strictly control the dimensions according to the drawings, and the other is to strictly control the appearance quality. Those that do not meet the dimensions will be repaired or scrapped. If the appearance is not good, Scratches are allowed, and the color difference, corrosion resistance, adhesion, etc. after spraying can be inspected. In this way, you can find expansion diagram errors, bad habits in the manufacturing process, errors in the manufacturing process, such as punch programming errors, mold errors, etc.
Package
After assembly and inspection, the packaging process begins. After inspection, the workpieces are put into special packaging bags for protection. Some workpieces that do not have special packaging are packaged with bubble wrap. Before packaging, the bubble wrap is cut into a size that can package the workpieces. , to avoid packaging on one side and cutting at the same time, which affects the processing speed; for large batches, special cartons or bubble bags, rubber pads, pallets, wooden boxes, etc. can be customized. After packaging, put it into a carton, and then put the corresponding finished product or semi-finished product label on the carton.

 English
 Deutsch
 Français
 日本語
日本語

